
Review: Slow-Stitched Polar Bears
I’m reviewing the Slow-Stitched Polar Bears craft kit from Wattle & Loop in today’s post.
Disclosure: I received a complimentary kit for review from Timberdoodle. All views expressed are my own.
Slow Stitching

Have you heard of “slow stitching” before? I hadn’t before this beautiful Slow-Stitched Polar Bears kit came out in Timberdoodle’s catalog last spring. It’s a mix of applique and embroidery but more free-form than either technique. As I’ve mentioned before, I enjoy various fiber arts, so I was eager to try it.
Polar Bears Kit
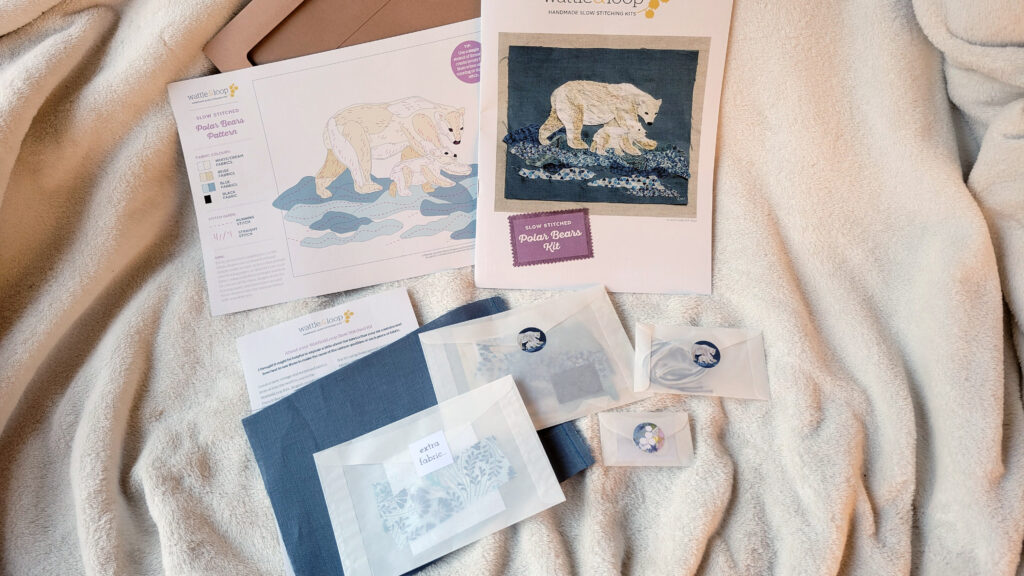
Materials in the Polar Bears Kit are carefully curated and exquisitely packaged. The kit includes background fabric, an assortment of fabric scraps for the bears and ice, several colors of DMC embroidery thread, a needle threader, a pattern guide, and a full-color instruction booklet. The fabric, thread, and needle with threader were tucked into small parchment envelopes sealed with coordinating stickers.
You will need a small pair of sharp scissors and a glue stick to complete the project.
Getting Started
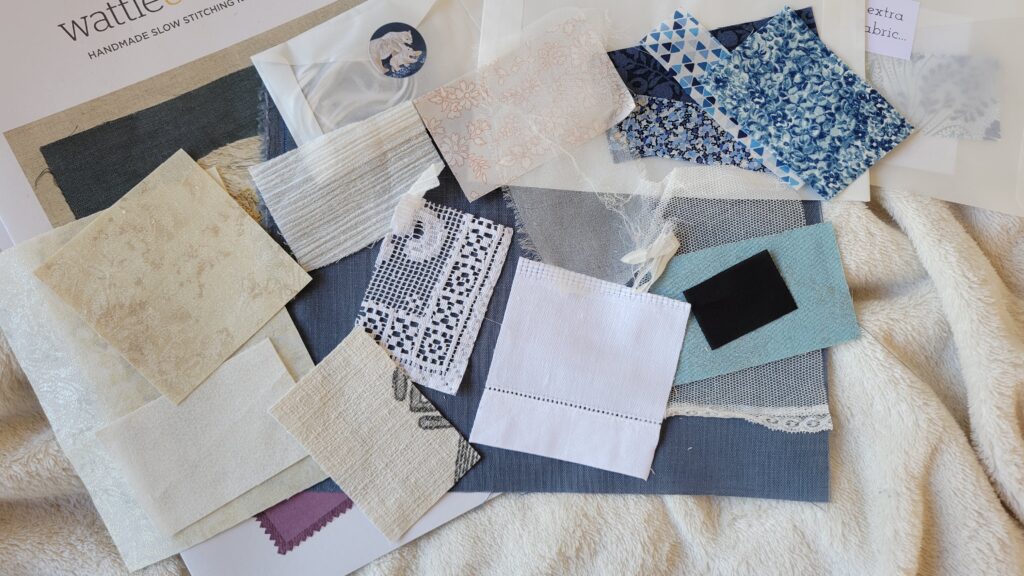
I thought Rebecca might be interested in this project, and she was until she realized how free-form it was. The fabric pieces are squares and rectangles, and there is no exact guide on how the fabric should be cut. That part intimidated Rebecca.
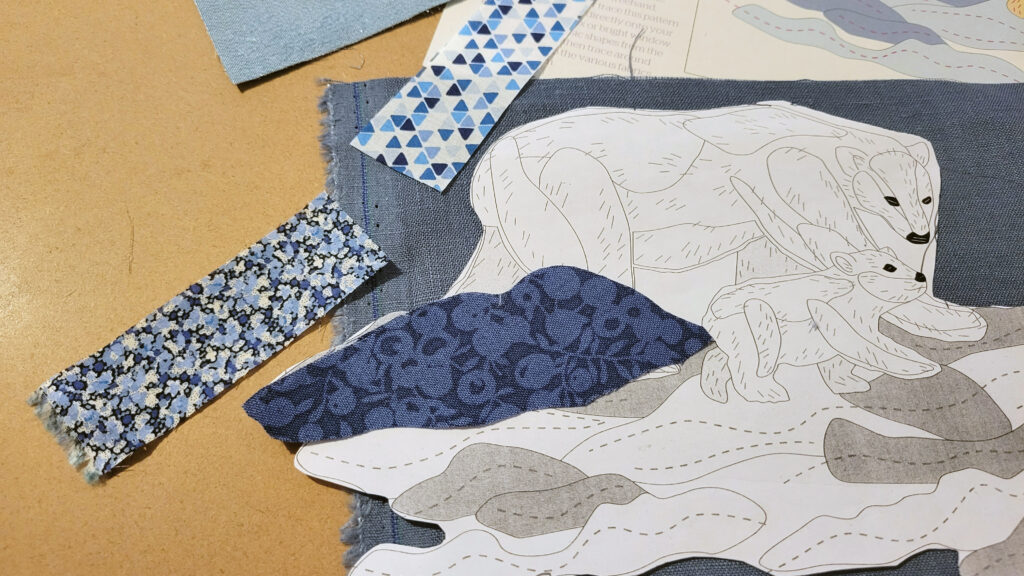
The instruction booklet suggests making a copy of the pattern and using that as your cutting guide. So that’s what I did. Other options are to just free-hand it using the picture as a reference or tracing it with a lightbox.
The Process

I lightly traced the outline on the background fabric to help with placement. After I cut out the iceberg pieces, I glued them in place with my glue stick.

The glue helps hold the pieces in place temporarily until you start stitching. I wasn’t sure if I should start stitching as I placed each piece or glue everything on first. I decided to go ahead and get the first layer on before stitching. Apparently, there aren’t any rules.

Once I started stitching, I added more small scraps of fabric and lace here and there to give the piece texture.
My Thoughts

I found slow stitching to be very enjoyable, particularly after I got the base layers on. Changing direction with the stitches and adding more and more layers is what made this piece so interesting. It was hard to know when to stop.
No special sewing skills are required. The instruction booklet shows how to make a running stitch, a straight stitch, and a French knot. The French knot is the trickiest but completely unnecessary with this design. I didn’t even use that stitch, though I do know how to make it.

I tucked my finished picture back into the envelope it came in. The window on the envelope makes a nice little frame for it. I’ll save the pattern, leftover thread, and scraps in the envelope as well, in case one of the girls wants to try making one sometime. My mother has plenty of extra fabric scraps they could choose from.
I loved learning this technique. I want to try coming up with my own design next time. We’ll see how that goes.
More Art Reviews


One Comment
Pallie Ezell
Beautiful